Quickest way to run scalable spark jobs on AWS
AWS provides a managed service called Elastic Map Reduce (EMR) which allows you to run your map reduce workloads. As per AWS docs
Amazon EMR is the industry-leading cloud big data solution for petabyte-scale data processing, interactive analytics, and machine learning using open-source frameworks such as Apache Spark, Apache Hive, and Presto.
EMR let’s you run your distributed computing workloads on top of infrastructure such as EC2 or EKS while managing the networking and infrastructure lifecycle. There are 3 types of offerings
- EMR on EC2 (Elastic Compute)
- EMR on EKS (Elastic Kubernetes Service)
- EMR serverless
I was recently looking for a quick solution to deploy my spark jobs on cloud. My jobs needed to be run once every few weeks and I did not want to break my head over managing the infra. That’s when I discovered EMR serverless. EMR serverless let’s you run your spark jobs without worrying about what infra to use or even how to manage your infra. All you need to do is upload your jar in case of scala or java spark jobs or upload your .py file in case of pyspark jobs and it takes care of adding and removing resources as per your job’s compute and storage demands.
[!TIP] If your requirement is to run your spark workloads at the greater frequency - maybe few jobs every day, then I would recommend going with EMR on EC2 or EKS where you have more control over your infra and also more scope to reduce costs.
[!NOTE] With EMR Serverless, there are no upfront costs, and you pay for only the resources you use.
EMR serverless charges an aggregate of $0.052624 per vCPU per hour and $0.0057785 per GB per hour. You can find the more details here - https://aws.amazon.com/emr/pricing/
In this article I’ll be creating a simple scala spark job which reads a CSV file from AWS s3 and writes the data to an iceberg table. We will be configuring iceberg to use AWS Glue catalog as the metastore
Creating a simple spark job
Prerequisites
I use sdkman.io for all possible installations and it has been a huge help.
- JDK 11 (
sdk install java 11.0.24-zulu) - Gradle build tool (
sdk install gradle) - Scala 2.12.19 (
sdk install scala 2.12.19) - AWS CLI (https://docs.aws.amazon.com/cli/latest/userguide/getting-started-install.html)
- Intellij IDE - I will be using community license for now. If you are using Intellij Ultimate, you can directly create a spark project.
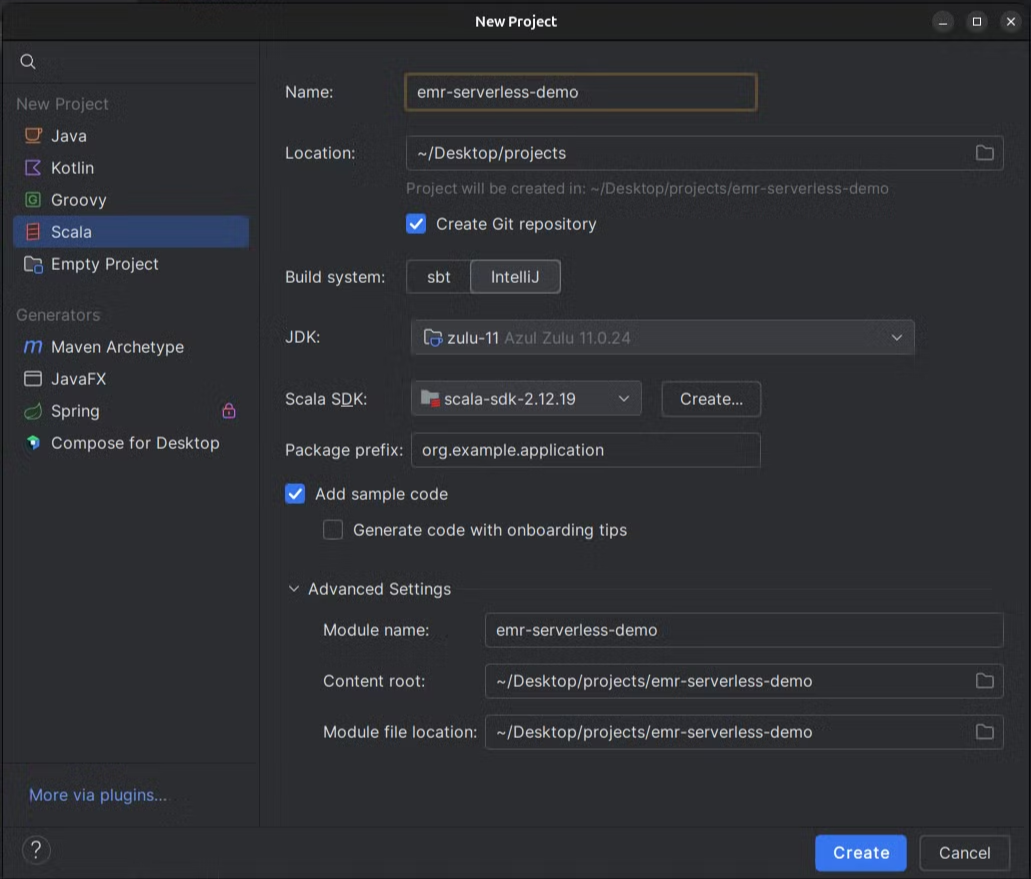
Creating an intellij project
Open intellij →create new project → scala project (install scala plugin using the “more via plugins” option) → fill the below details
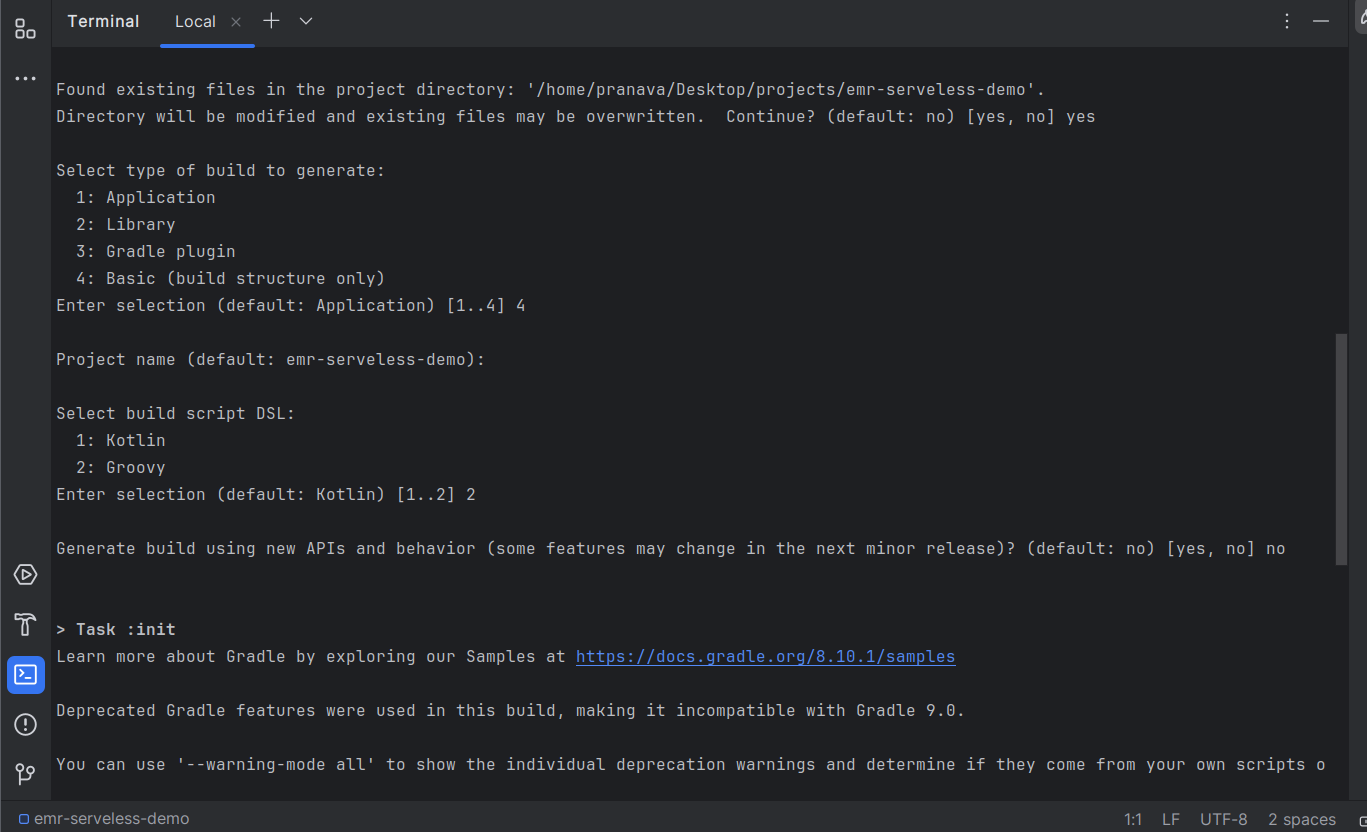
Setup gradle build tool
Run gradle init on your terminal and select the options as shown in the image below
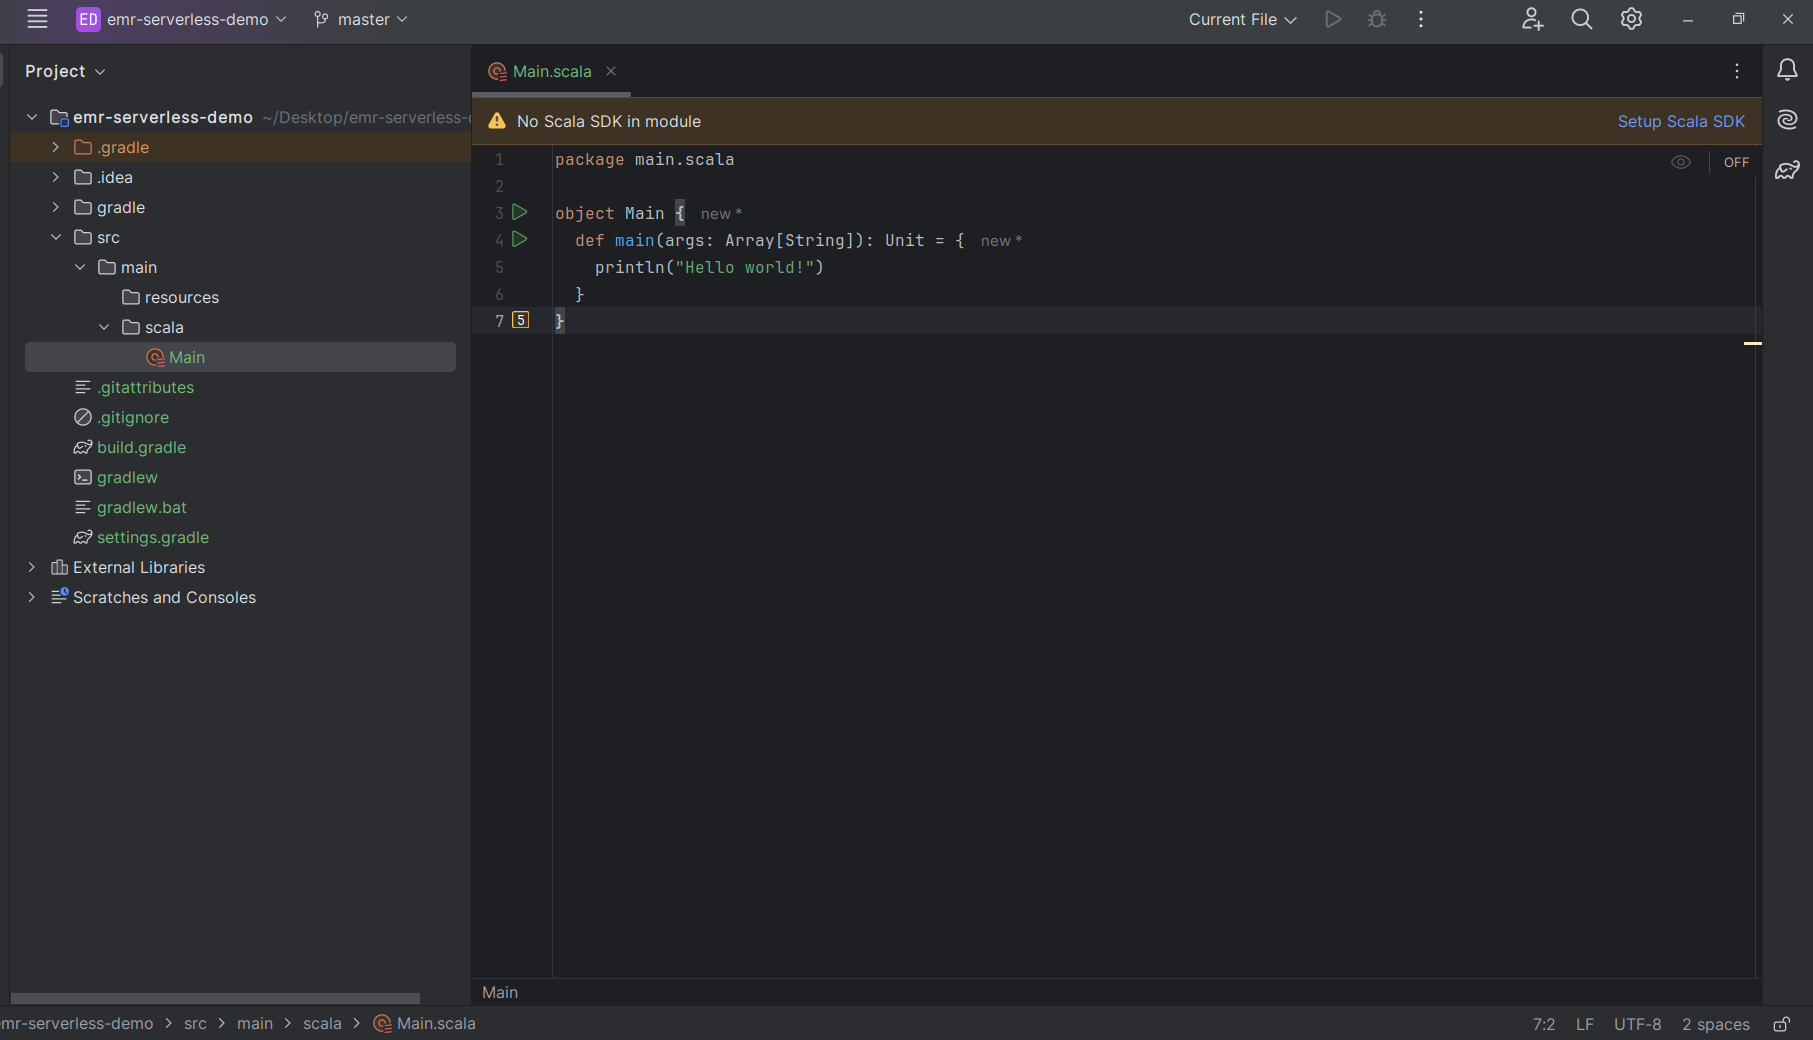
Create a main folder with 2 sub folders - resources and scala. Move the Main.scala class under src/main/scala directory. Now our project structure should look like this
Now let us add the required dependencies in the build.gradle file. We will be adding the following dependencies
- scala 2.12.19
- spark 3.5.0 - our primary query engine
- aws sdk 2.25.35
- glue - our primary catalog
- s3 - our blob storage
- iam - for access/permission management to other aws resources like s3, glue
- sts - for iam trust relationship management
- dynamodb - glue uses dynamodb for acquiring read/write locks
- kms - for encryption and decryption of data
- apache-client - required by aws sdk to handle any http requests and responses while interacting with other aws resources
- apache iceberg - our lakehouse table format
- spotless - for code formatting
build.gradle looks like this
plugins {
    id 'scala'
    id 'java'
    id 'com.diffplug.spotless' version "6.18.0"
    id 'com.github.johnrengelman.shadow' version '7.1.2'
}

repositories {
    mavenCentral()
    mavenLocal()
    flatDir {
        dirs "libs"
    }
}

ext {
    scalaMajorVersion = "2.12"
    scalaMinorVersion = "19"
    sparkVersion = "3.5.0"
    sparkMajorVersion = "3.4"
    scalaTestVersion = "3.2.9"
    logVersion = "3.9.2"
    awsSdkVersion = "2.25.35"
}

dependencies {
    //Scala dependencies
    implementation "org.scala-lang:scala-library:${scalaMajorVersion}.${scalaMinorVersion}"
    implementation "org.scala-lang:scala-reflect:${scalaMajorVersion}.${scalaMinorVersion}"
    implementation "org.scala-lang:scala-compiler:${scalaMajorVersion}.${scalaMinorVersion}"
    compileOnly "org.scala-lang:scala-compiler:${scalaMajorVersion}.${scalaMinorVersion}"

    implementation platform("software.amazon.awssdk:bom:${project.ext.awsSdkVersion}")
    implementation "software.amazon.awssdk:glue"
    implementation "software.amazon.awssdk:sts"
    implementation "software.amazon.awssdk:s3"
    implementation "software.amazon.awssdk:iam"
    implementation "software.amazon.awssdk:dynamodb"
    implementation "software.amazon.awssdk:kms"
    implementation "software.amazon.awssdk:apache-client"

    //Scala logging
    implementation "com.typesafe:config:1.4.2"
    implementation "com.typesafe.scala-logging:scala-logging_${scalaMajorVersion}:${logVersion}"

		//Apache Spark dependencies
    implementation "org.apache.spark:spark-sql_${scalaMajorVersion}:${sparkVersion}"
    implementation "org.apache.spark:spark-launcher_${scalaMajorVersion}:${sparkVersion}"
    implementation "org.apache.spark:spark-catalyst_${scalaMajorVersion}:${sparkVersion}"
    implementation "org.apache.spark:spark-core_${scalaMajorVersion}:${sparkVersion}"

    //Apache Iceberg dependencies
    implementation 'org.apache.iceberg:iceberg-core:1.4.3'
    implementation 'org.apache.iceberg:iceberg-aws:1.4.0'
    implementation "org.apache.iceberg:iceberg-spark-runtime-${sparkMajorVersion}_${scalaMajorVersion}:1.4.0"
    implementation "org.apache.iceberg:iceberg-spark-extensions-${sparkMajorVersion}_${scalaMajorVersion}:1.4.0"

    //Runtime dependencies
    implementation "com.fasterxml.jackson.core:jackson-core:2.17.0"
    implementation "com.github.ben-manes.caffeine:caffeine:2.9.3"

    //Test dependencies

    //Scala test dependencies
    testImplementation "org.scalatest:scalatest_${scalaMajorVersion}:${scalaTestVersion}"

    // JUnit Platform dependencies
    testImplementation "org.junit.jupiter:junit-jupiter-api:5.8.2"
    testRuntimeOnly "org.junit.jupiter:junit-jupiter-engine:5.8.2"
    testRuntimeOnly "co.helmethair:scalatest-junit-runner:0.1.10"

}

test {
    enabled = false
    useJUnitPlatform {
        includeEngines('scalatest', 'junit-jupiter')

        testLogging {
            events("passed", "skipped", "failed")
        }
    }
}

spotless {
    scala {
        scalafmt('3.0.0').configFile("$rootDir/.scalafmt.conf")
        target 'src/main/scala/**/*.scala', 'src/test/scala/**/*.scala'
    }
}

tasks.named("shadowJar")  {
    dependsOn 'spotlessApply'
    zip64= true
}

tasks.named("build") {
    dependsOn 'spotlessApply'
}
Now rename the Main.scala class to DemoJob.scala and paste the below code
import org.apache.spark.sql.{SaveMode, SparkSession}
import service.{SessionType, SparkSessionFactory}

object DemoJob {
  private val inputFilePath = "s3://input-bucket/sample_flower_data.csv"
  private val tableName     = "flower_data"
  private val database = "demo"
  private val catalogName = "glue_catalog"

  private def runJob(): Unit = {
    val spark = SparkSession
      .builder()
      .appName("IcebergSession")
      .config(
        "spark.sql.extensions",
        "org.apache.iceberg.spark.extensions.IcebergSparkSessionExtensions"
      )
      .config("spark.sql.catalog.glue_catalog", "org.apache.iceberg.spark.SparkCatalog")
      .config(
        "spark.sql.catalog.glue_catalog.warehouse",
        s"s3://warehouse-bucket/"
      ) //TODO: replace with appropriate data lake bucket
      .config(
        "spark.sql.catalog.glue_catalog.catalog-impl",
        "org.apache.iceberg.aws.glue.GlueCatalog"
      )
      .config("spark.sql.catalog.glue_catalog.io-impl", "org.apache.iceberg.aws.s3.S3FileIO")
      .config("fs.s3a.block.size", "128M")
      .config("spark.default.parallelism", "40")
      .config("spark.executor.instances", "20")
      .config("spark.sql.iceberg.read.parallelism", "20")
      .getOrCreate()
    val df = spark.read
      .option("header", "true")
      .option("inferSchema", "true")
      .format("csv")
      .load(inputFilePath);
    //Feel free to add all spark transforms here
    df.write.mode(SaveMode.Overwrite).saveAsTable(generateTableName())
    spark.close()
  }

  private def generateTableName(): String = {
    "%s.%s.%s".format(catalogName, database, tableName)
  }

  def main(args: Array[String]): Unit = {
    runJob()
  }
}
Here we are
- Reading the input file
sample_flower_data.csvfroms3://input-bucket/sample_flower_data.csv - Writing to an iceberg table called
flower_data
Build the project by running ./gradlew build in your terminal.
[!TIP] If you face any build issues, it is most likely because of version mismatches. Verify that your intellij and gradle have been configured with the correct jdk version (11 or 17)
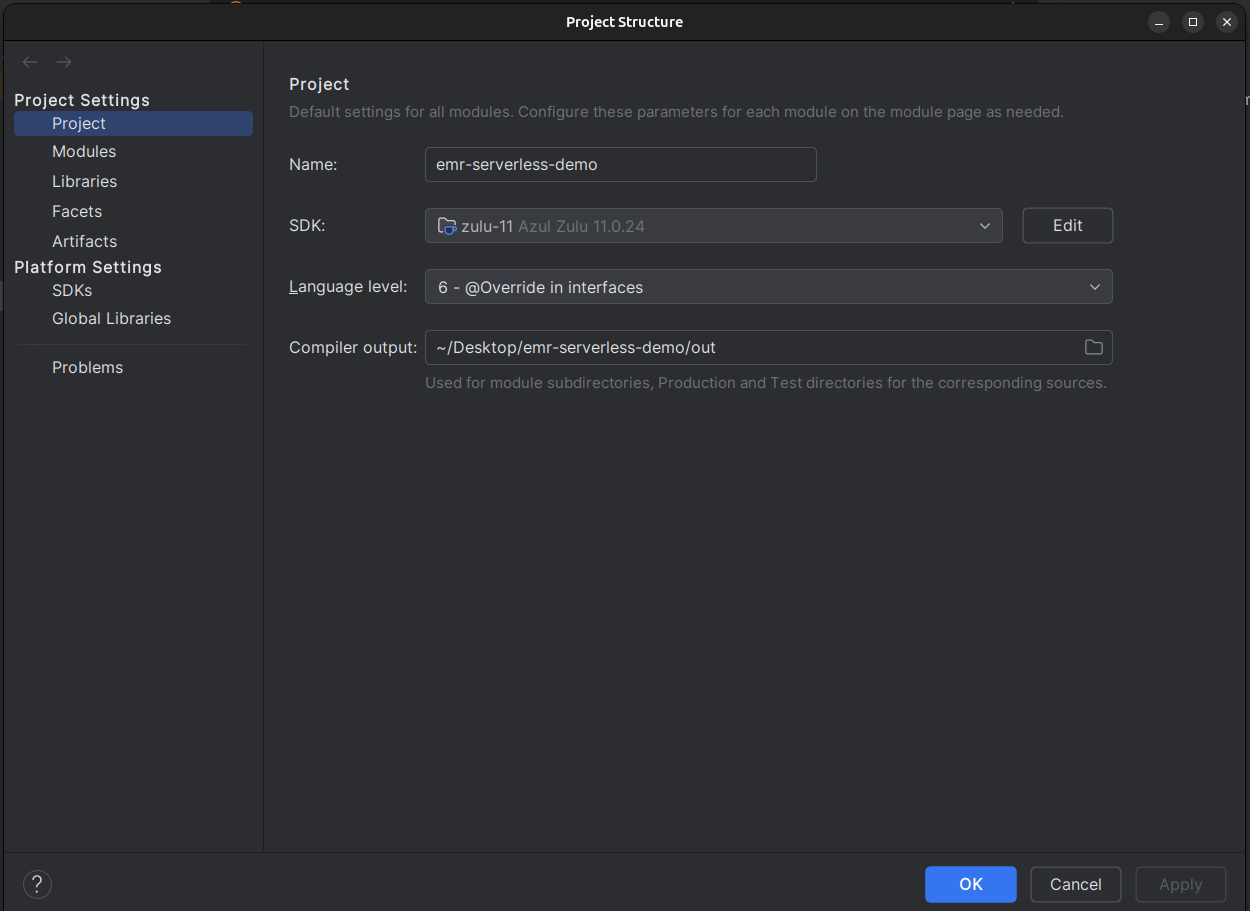
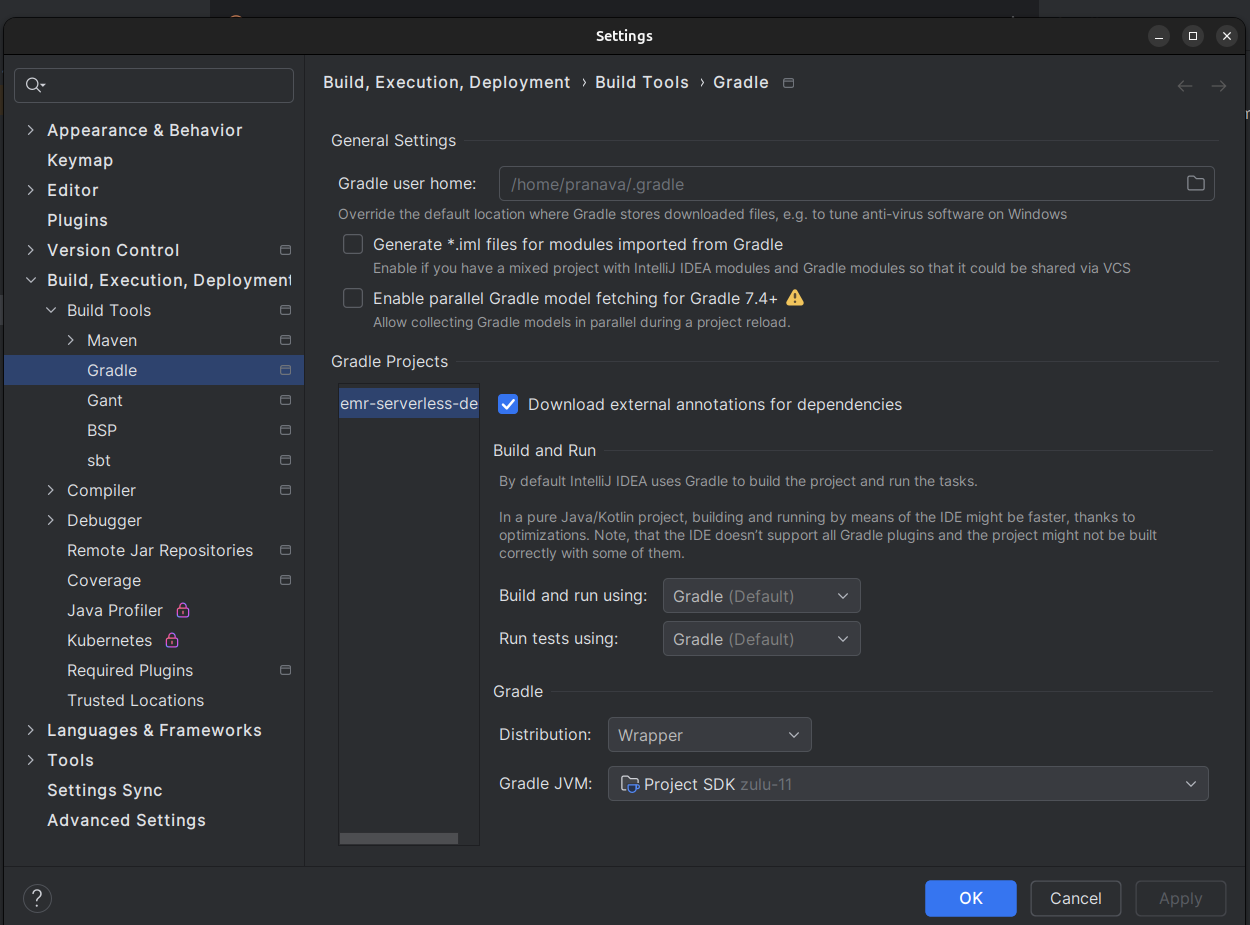
(File menu→ Project Structure)
(Right side panel → Gradle menu → Build tool settings)
Creating an uber / fat jar
There are 2 ways the EMR cluster can install the dependencies for our job
- By passing the
--packagesargument ( This would require the EMR cluster to have access to your artifactory in order to download the dependency during cluster start up time) - By consuming a uber jar with all dependencies packaged
We will be taking the second route. To create a uber jar we will be using the gradle shadow jar plugin
./gradlew shadowJar
The above command will generate an uber jar by name emr-serveless-demo-all.jar under the build/libs/ directory.
Congratulations!! We have successfully build a simple scala spark job!
[!NOTE] You can find the entire code here - https://github.com/bpranava/emr-serverless-demo
AWS side of changes
Publishing the uber jar to S3
Now let us try to run this spark jar on EMR serverless. First thing we need to do is upload the uber jar to a S3 bucket. Create a S3 bucket by name “etl-jars”. Open your IDE terminal, using aws cli configure your AWS credentials if not done before and then run
aws s3 cp build/libs/emr-serveless-demo-all.jar s3://etl-jars/emr-serveless-demo-all.jar
You can automate this by getting your CI pipelines like Jenkins to do this for you
Uploading the input data to S3
Create a new bucket call input-bucket and upload the file previously used in our code called sample_flower_data.csv (Can be downloaded from https://github.com/bpranava/emr-serverless-demo/blob/master/src/main/resources/sample_flower_data.csv).
The S3 URI for the file should be s3://input-bucket/sample_flower_data.csv
Understanding the EMR serverless from the UI
On your AWS console navigate to EMR. On the left menu, you should be able to find EMR serverless on the top. On selecting the option, you should see a new page with details about EMR serverless offering and a “Get Started” / “Manage Applications” button to the right side.
Clicking on “Manage Applications” creates a new EMR studio for you where you can create applications, submit and run your workloads
There are 2 main components that you should be aware of
-
Application
An application is a logical boundary inside which you can run all your workloads in parallel. Here you decide what query engine you require - Spark / Hive
-
Job
A job is a single unit of workload, ie. in our case a single spark job
[!NOTE] Here are the main AWS account related assumptions that I am making for this demo
1. VPC is configured
2. You have 2 subnets which allow ingress and egress
3. All S3 buckets used are within the same VPC boundary
EMR application
The EMR application let’s you select the query engine, the network configurations, monitoring configurations and also set pre initialised infra if necessary.
By default the EMR Serverless application runs on a secure Amazon Virtual Private Cloud (VPC) strictly apart from other applications. Hence you would have to configure your security group IDs and subnet IDs in the network configuration so that your job can access all the resources (eg: S3 ) within your VPC.
Let us check how creating an EMR application looks like from the AWS console
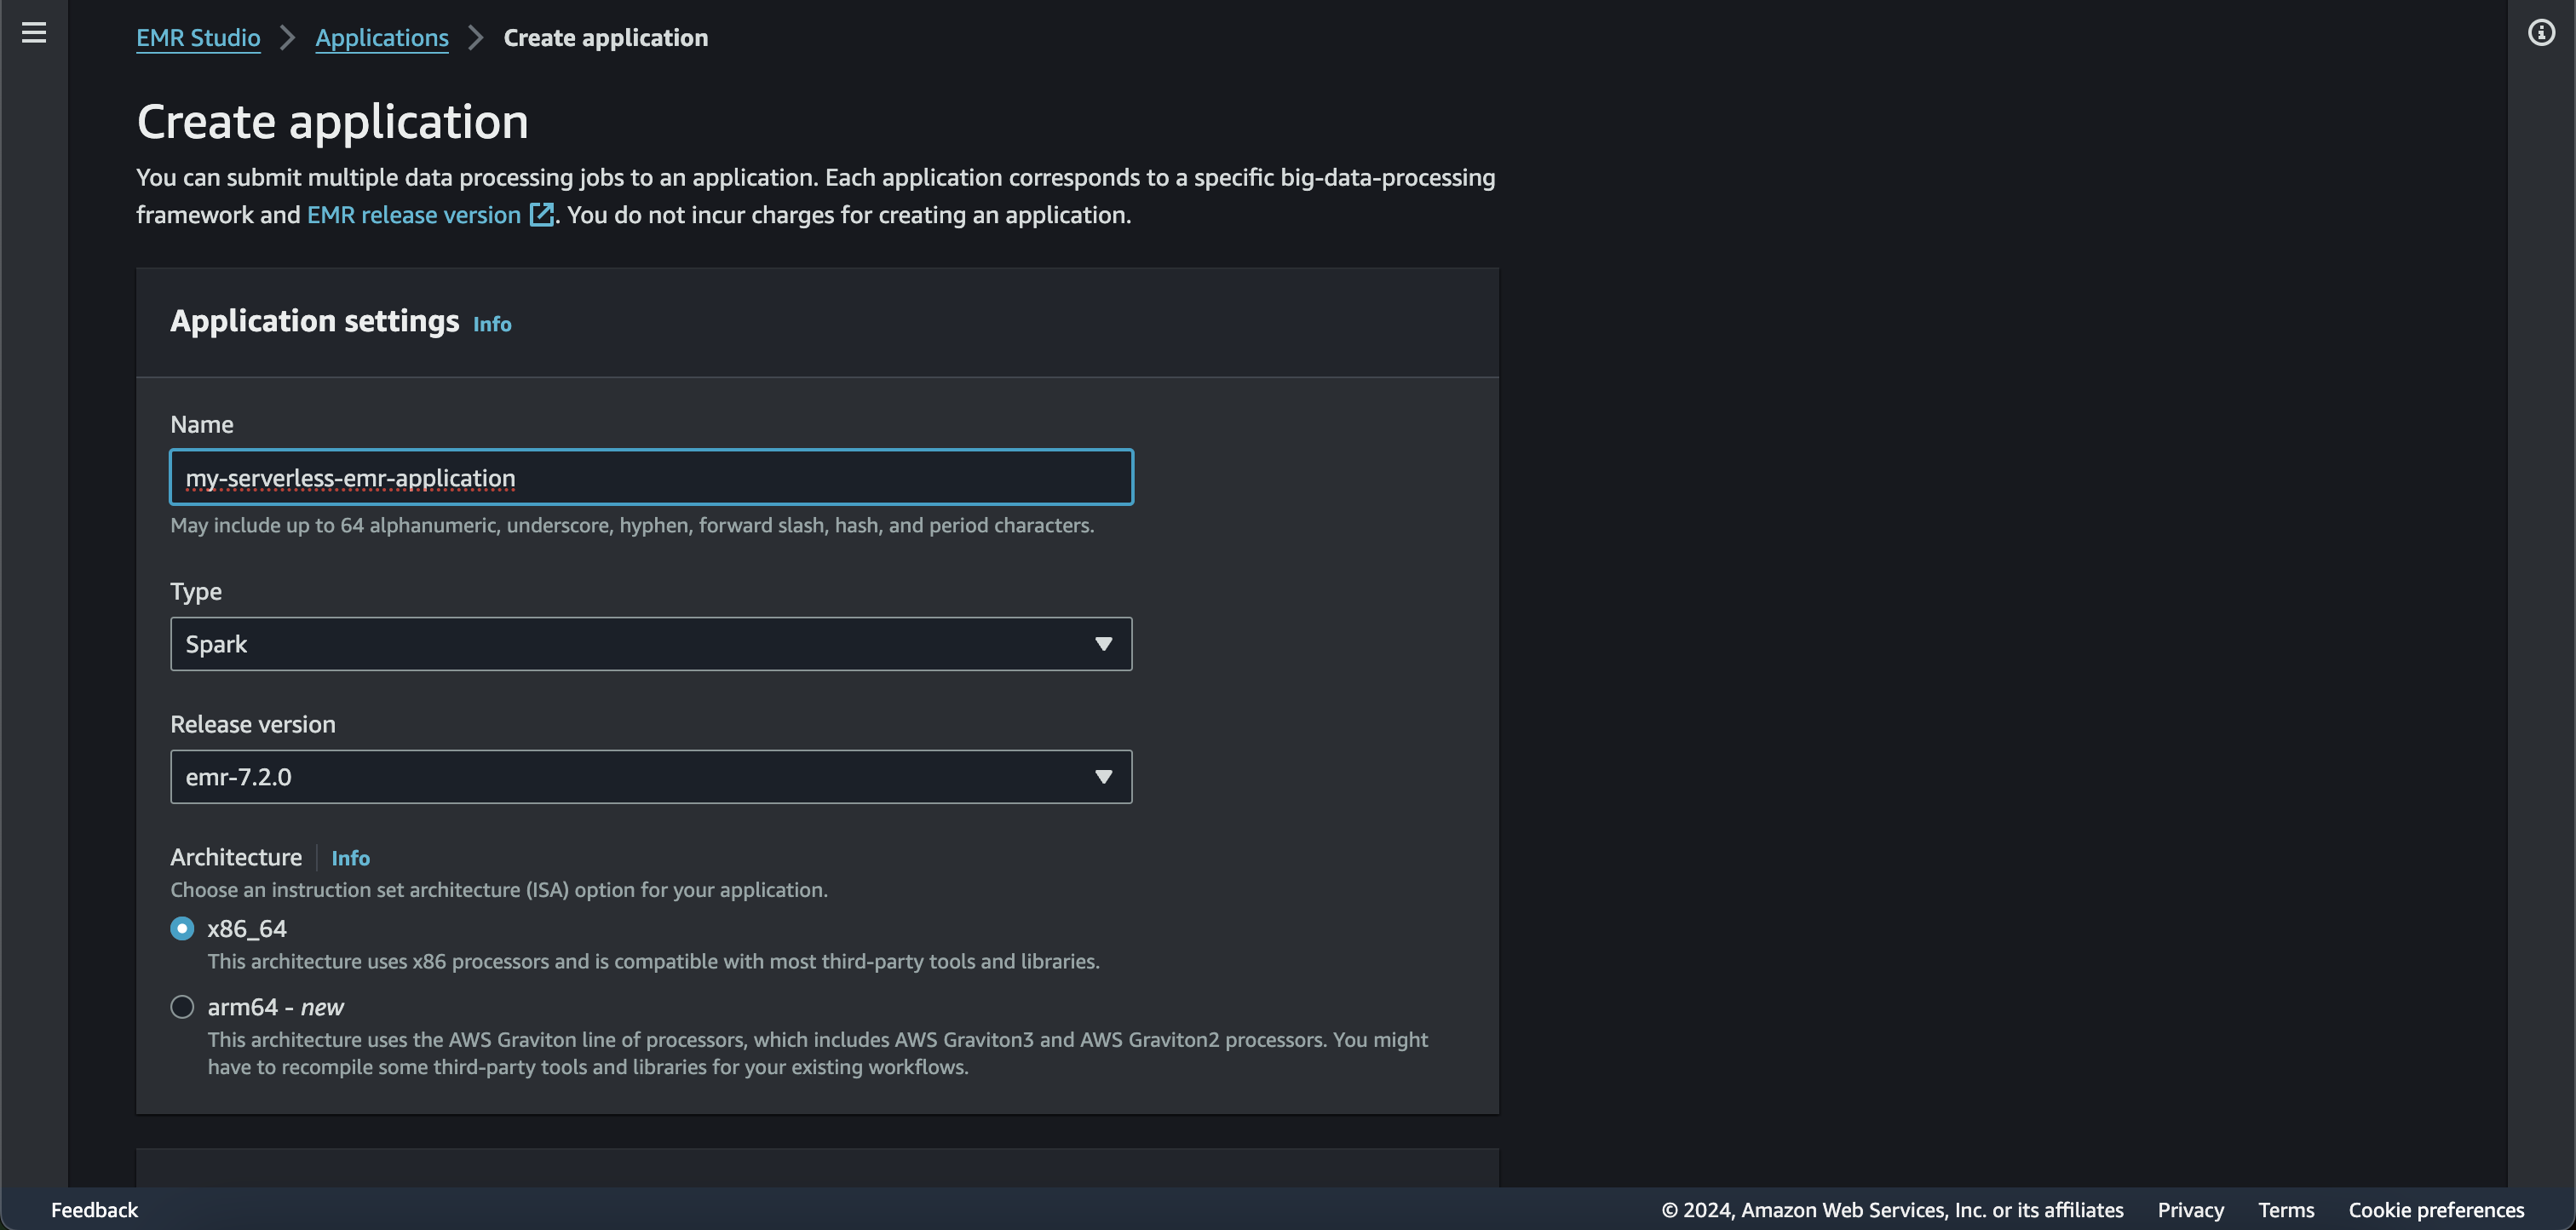
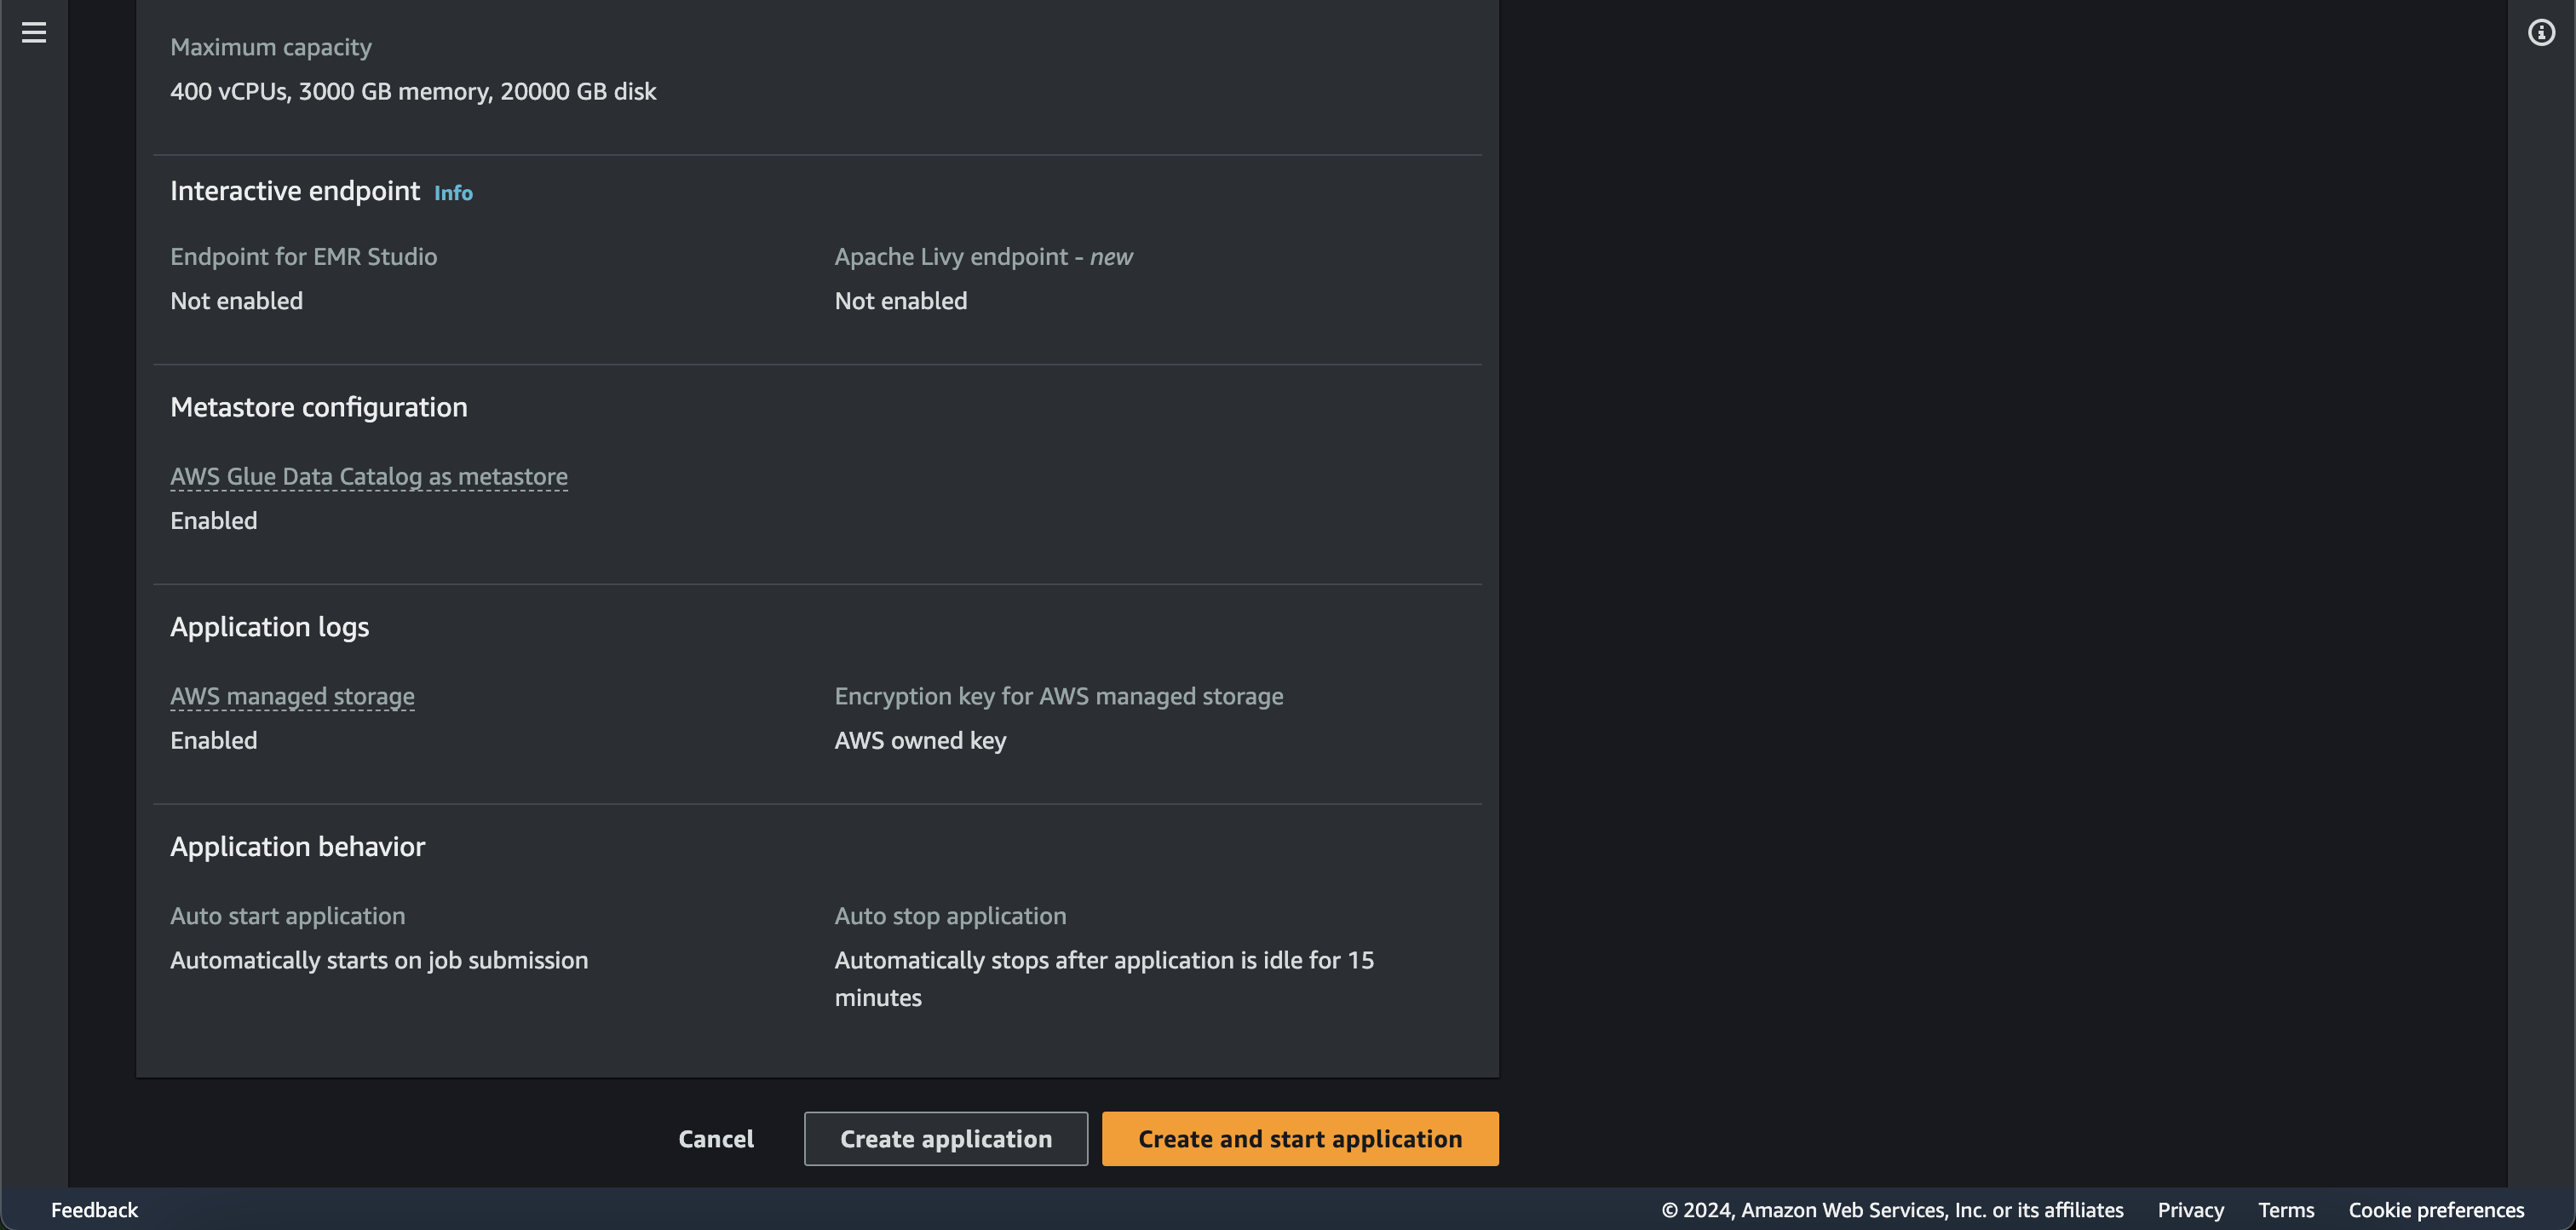
For this demo purpose we are selecting the default settings. Also, AWS Glue Data Catalog is configured by default as the metastore.
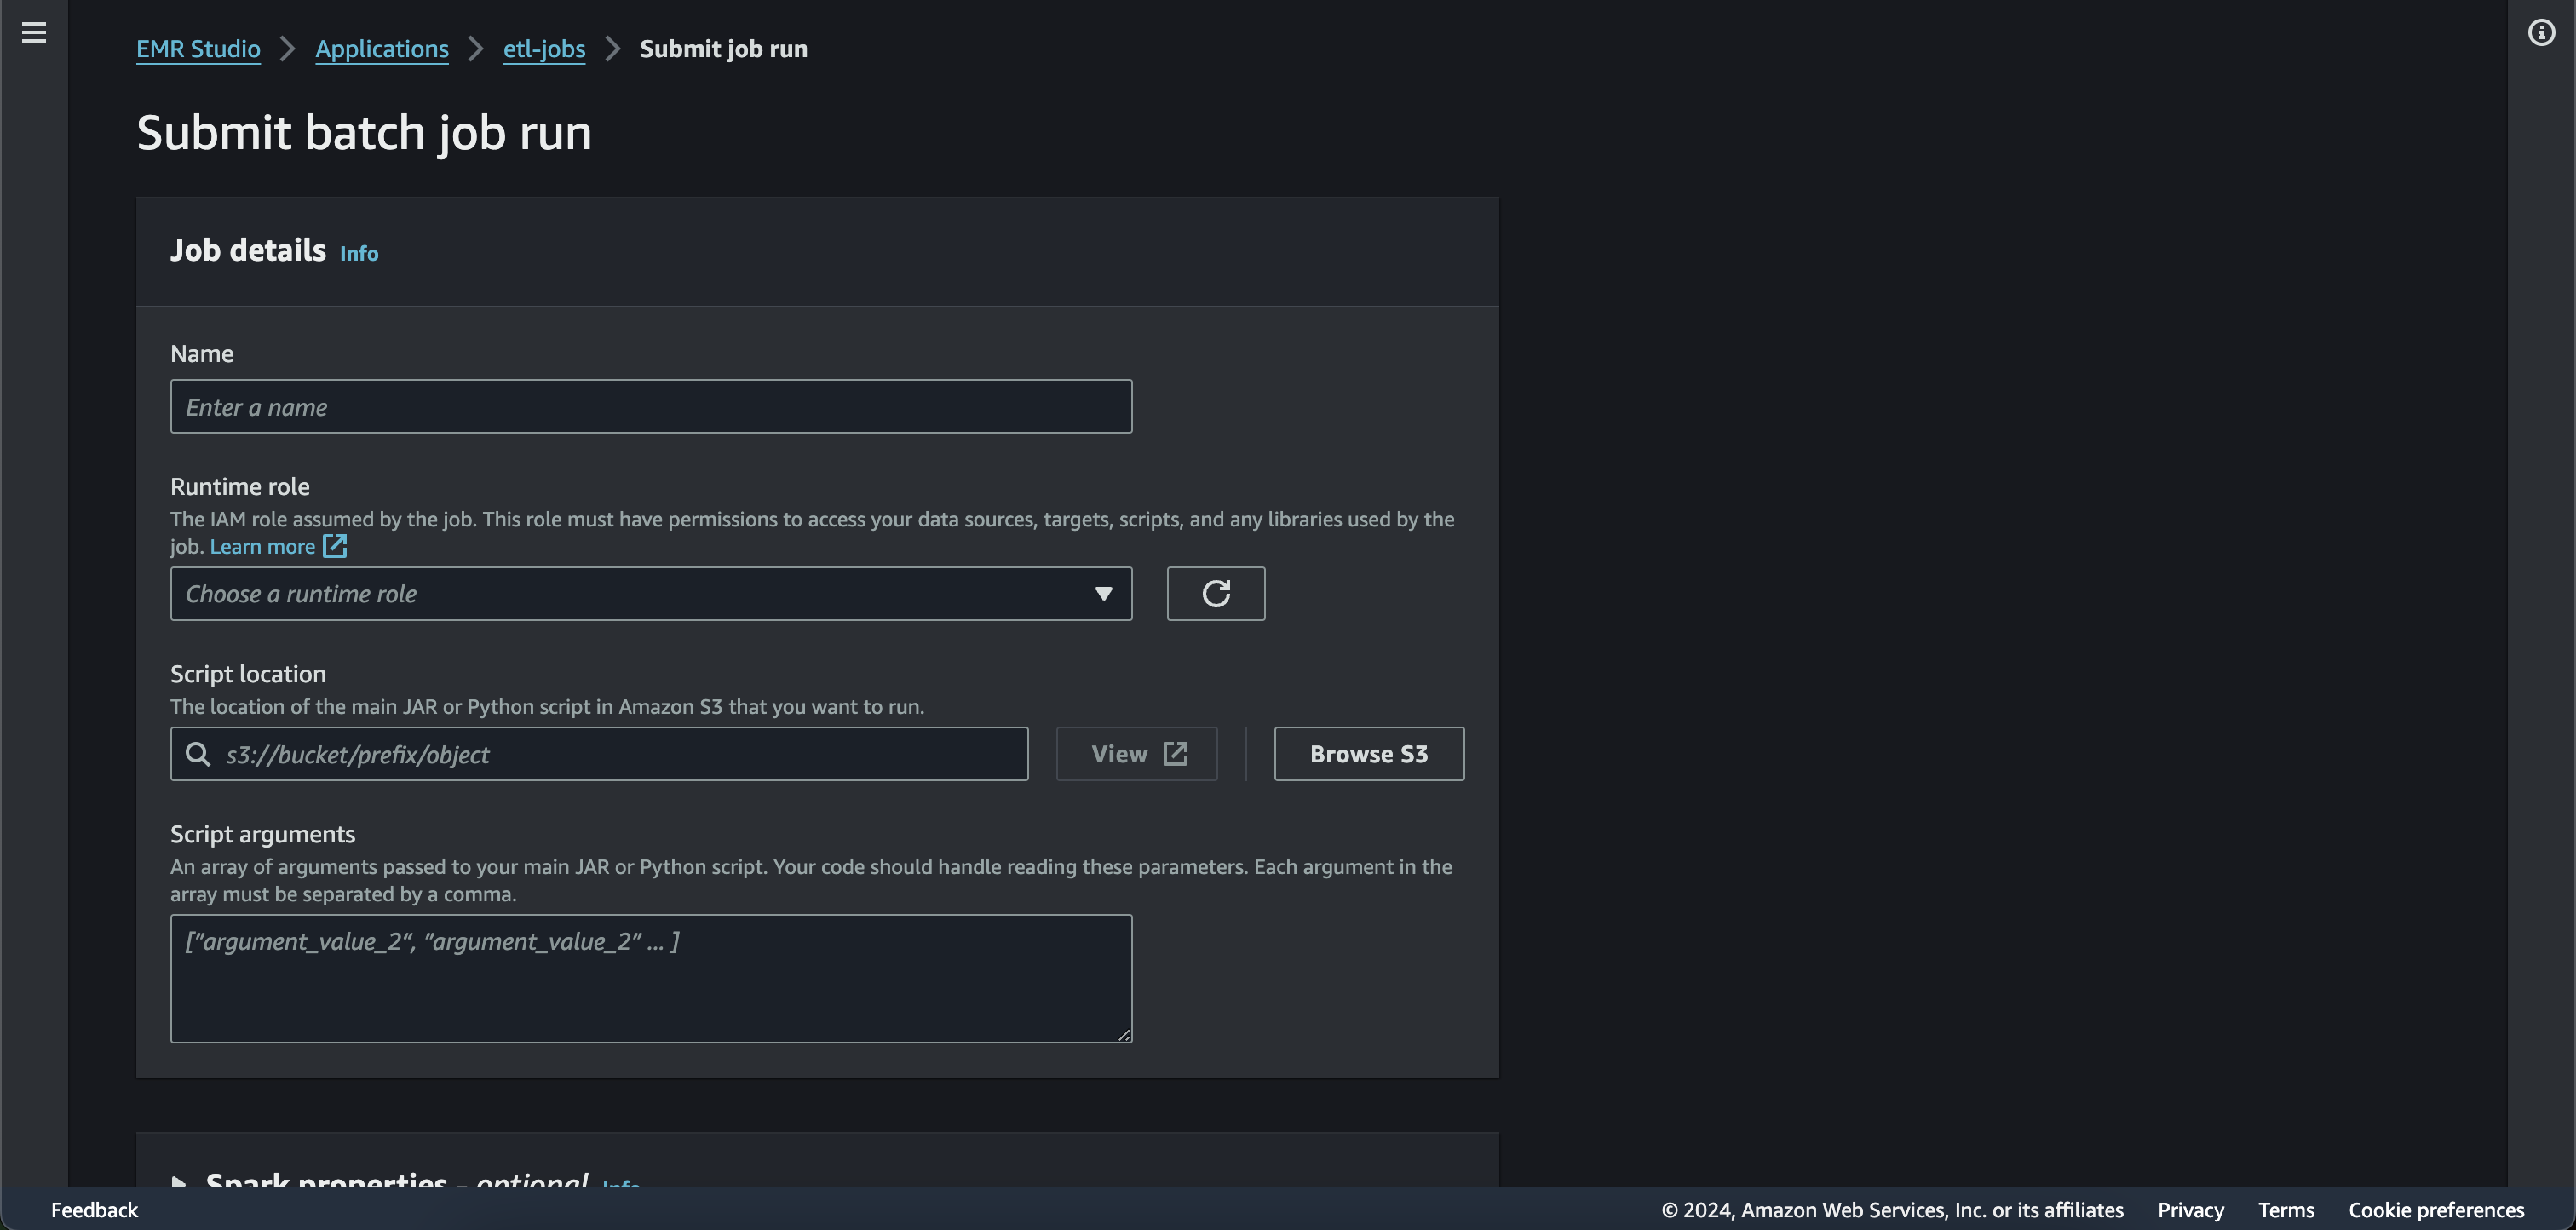
EMR job
“A job run is a request submitted to an EMR Serverless application that the application asychronously executes and tracks through completion”
While submitting a job you can set the spark config properties, the IAM role with the necessary resource access permissions and the executable file (python script or jar)
IAM role
Since our spark job reads data from S3 and writes to Iceberg using AWS Glue as the catalog, we need an IAM role with the permission to access these resources. I am also providing access to Cloudwatch which will be used for collecting the logs. For the demo purposes let us call the role as demo-spark-role .
Now create an IAM policy by name demo-spark-policy using the below policy document.
{
                Version: "2012-10-17",
                Statement: [
                    {
                        Sid: "ReadAccessForEMRSamples",
                        Effect: "Allow",
                        Action: [
                            "s3:GetObject",
                            "s3:ListBucket",
                        ],
                        Resource: [
                            "arn:aws:s3:::*.elasticmapreduce",
                            "arn:aws:s3:::*.elasticmapreduce/*",
                        ],
                    },
                    {
                        Sid: "S3BucketAccess",
                        Effect: "Allow",
                        Action: [
                            "s3:PutObject",
                            "s3:GetObject",
                            "s3:ListBucket",
                            "s3:DeleteObject",
                        ],
                        Resource: ["*"],
                    },
                    {
                        Sid: "GlueCreateAndReadDataCatalog",
                        Effect: "Allow",
                        Action: [
                            "glue:GetDatabase",
                            "glue:CreateDatabase",
                            "glue:GetDataBases",
                            "glue:CreateTable",
                            "glue:GetTable",
                            "glue:UpdateTable",
                            "glue:DeleteTable",
                            "glue:GetTables",
                            "glue:GetPartition",
                            "glue:GetPartitions",
                            "glue:CreatePartition",
                            "glue:BatchCreatePartition",
                            "glue:GetUserDefinedFunctions",
                        ],
                        Resource: ["*"],
                    },
                    {
                        Sid: "CloudWatchLogsFullAccess",
                        Effect: "Allow",
                        Action: [
                            "logs:*",
                            "cloudwatch:GenerateQuery"
                        ],
                        Resource: "*"
                    }
                ],
            }
Now attach the IAM policy demo-spark-policy with the role demo-spark-role .
The IAM trust policy for the role should look like below
{
            Version: "2012-10-17",
            Statement: [{
                Effect: "Allow",
                Principal: {
                    Service: "emr-serverless.amazonaws.com",
                },
                Action: "sts:AssumeRole",
            }],
}
[!TIP] You can use Infrastructure as Code tools like Terraform or Pulumi to automate the creation of IAM roles and policies
AWS Glue Catalog
The glue catalog is a managed metadata repository for all your data assets across various data sources.
For our demo we will be using Glue Catalog as our metadata store. One can choose to replace glue with hive metastore.
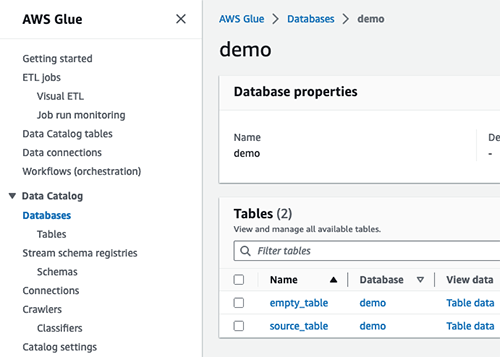
Creating a Glue catalog database
Let us create a database on Glue called “demo”.
Go to the AWS console → AWS Glue → select Databases from the left menu → Add database → Enter name as “demo” → Click on Create database
Running the spark job on EMR serverless using AWS CLI
First let us create the EMR serverless application assuming the security group ids are sg-1 and sg-2 and the subnet ids are subnet-1, subnet-2.
aws emr-serverless create-application \
                 --name my-serverless-emr-application \
                 --release-label emr-7.1.0 \
                 --type SPARK \
                 --network-configuration "{
                     \"securityGroupIds\": [\"sg-1\",\"sg-2\"],
                     \"subnetIds\": [\"subnet-1\",\"subnet-2\"]
                 }" \
                 --monitoring-configuration '{
                     "managedPersistenceMonitoringConfiguration": {
                         "enabled": true
                     },
                     "cloudWatchLoggingConfiguration": {
                         "enabled": true,
                         "logTypes": {
                           "SPARK_DRIVER": ["stdout", "stderr"]
                         }
                     }
                 }'
This command creates an EMR Serverless application with the following configurations:
- Application name: my-serverless-emr-application
- EMR release: 7.1.0
- Type: Spark
- Network: Uses two specified subnet IDs and security groups
Make sure to replace the subnet IDs and security group IDs with your own values.
The above command returns a new application id. Next, we need to submit the spark job to the application. Use the below command
aws emr-serverless start-job-run \
    --application-id "APPLICATION_ID" \
    --execution-role-arn "emr_role_arn" \
    --job-driver '{
        "sparkSubmit": {
            "entryPoint": "s3://etl-jars/emr-serveless-demo-all.jar",
            "entryPointArguments": "",
            "sparkSubmitParameters": "--class DemoJob \
                --executor-cores=4 \
                --conf spark.driver.cores=4 \
                --conf spark.executor.memory=12G \
                --conf spark.driver.memory=8G \
                --conf spark.dynamicAllocation.initialExecutors=4 \
                --conf spark.dynamicAllocation.minExecutors=2 \
                --conf spark.dynamicAllocation.maxExecutors=30 \
                --conf spark.hadoop.hive.metastore.client.factory.class=com.amazonaws.glue.catalog.metastore.AWSGlueDataCatalogHiveClientFactory \
                --conf spark.emr-serverless.driverEnv.JAVA_HOME=/usr/lib/jvm/java-17-amazon-corretto.x86_64/ \
                --conf spark.executorEnv.JAVA_HOME=/usr/lib/jvm/java-17-amazon-corretto.x86_64/"
        }
    }' \
    --configuration-overrides '{
        "monitoringConfiguration": {
            "managedPersistenceMonitoringConfiguration": {
                "enabled": true
            },
            "cloudWatchLoggingConfiguration": {
                "enabled": true,
                "logTypes": {
                    "SPARK_DRIVER": ["stdout", "stderr"]
                }
            }
        }
    }'
Replace
- emr_role_arn with the ARN of the previously created demo-spark-role
- APPLICATION_ID with the application id generated from the previous command
You can check the status of the job run by using the get-job-run API. Using the previously generated application id and job id, run
aws emr-serverless get-job-run \
    --application-id "application_id" \
    --job-run-id "job_id" \
    --query "jobRun.state" \
    --output text
Verifying the Iceberg data
Querying your iceberg data through Athena
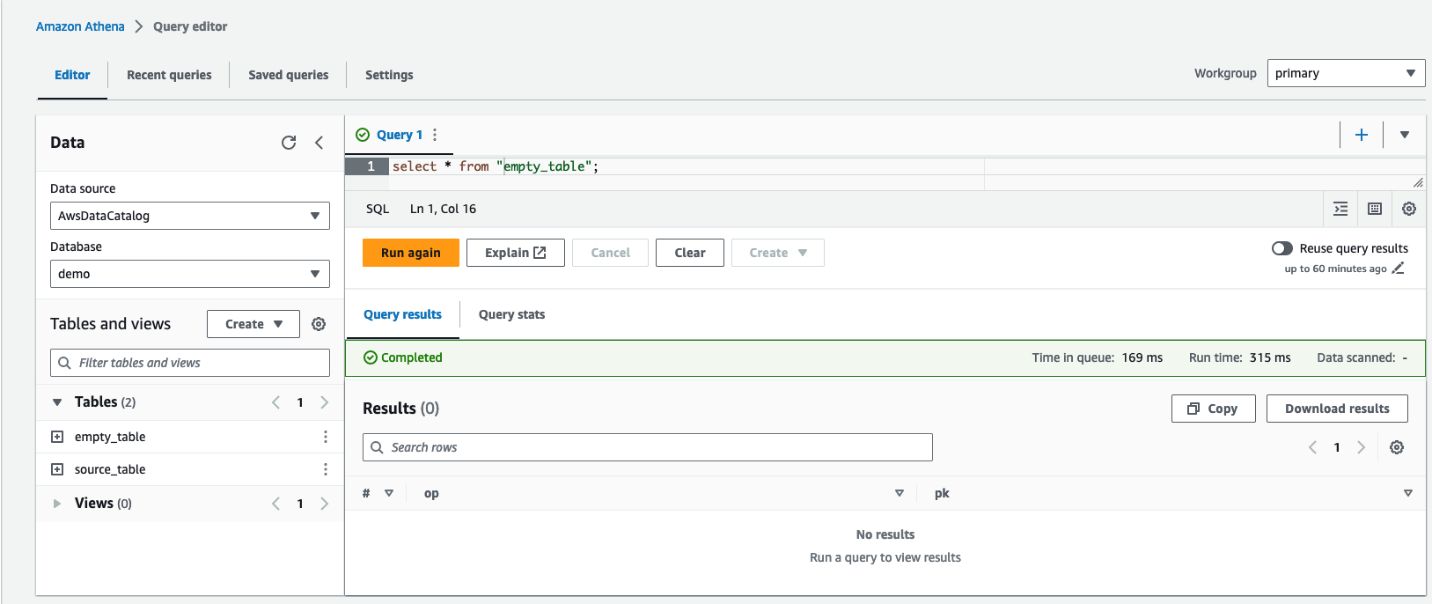
AWS Athena is a query engine which let’s you query your iceberg data. By default Athena has an Iceberg connector and has access to Glue metastore. Let us verify that the table flower_data has been written into the “demo” database
On AWS console open Athena. Note that Athena requires you to configure a S3 bucket where it will write the results of your query.
On the left drop down, select “demo” as the database and run the below query
select * from "demo"."flower_data"
Your Athena window looks something like below
Congratulations!!!
We have successfully deployed the spark job on EMR serverless and verified the results! 🎉